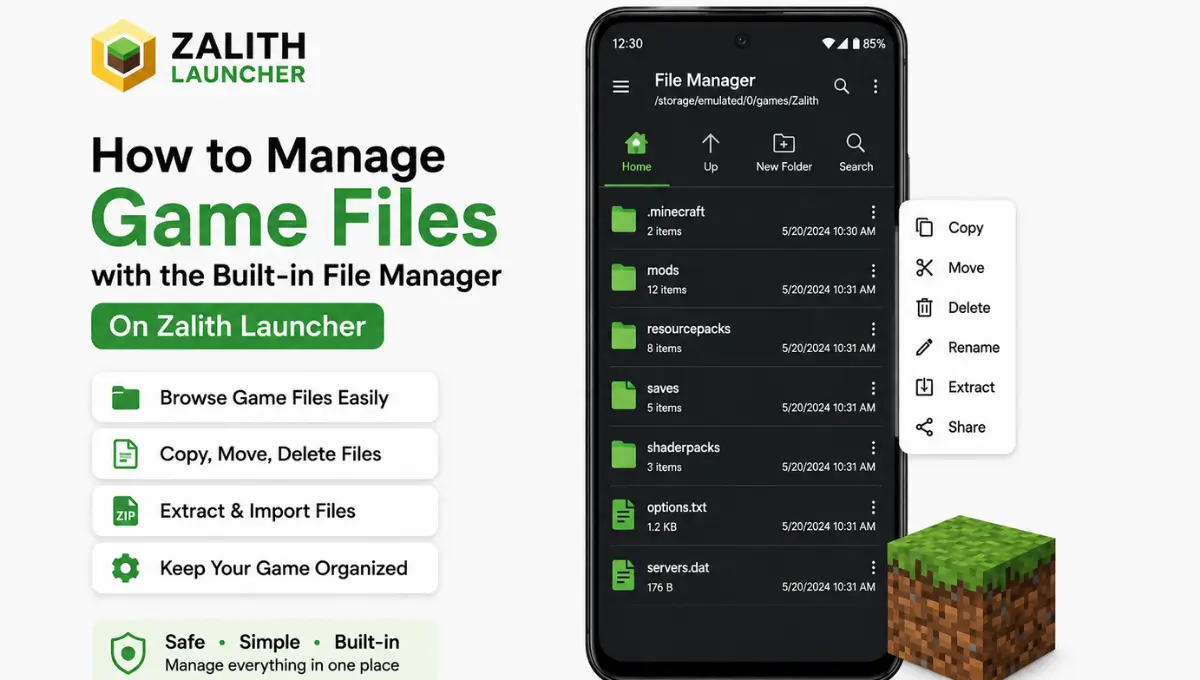
How to Manage Game Files with the Built-in File Manager On Zalith Launcher
You install Zalith Launcher, get Minecraft running, and then reality hits: mods, resource packs, saved worlds, shader packs and version folders all need a home somewhere on your phone. On a normal Android device that used to mean fighting scoped storage permissions, hunting through a third-party file explorer, or plugging into a PC just to move a single .zip file.
Zalith Launcher solves this with its built-in file manager, a tool that sits directly inside the app and gives you full access to every folder Minecraft actually uses, without root access and without a separate app. Most players know it exists but never use it beyond dragging a mod in once and forgetting about it.
This guide walks through exactly what the file manager does, how each game folder is organized, and a complete step-by-step process for importing, backing up, and cleaning up your files the right way. By the end you’ll be managing your game files like someone who actually knows what every folder is for.
Zalith Launcher Why a Built-in File Manager Actually Matters
Android’s storage system was never designed for an app like Minecraft Java Edition, which expects dozens of loose folders for versions, saves, resource packs, and mods, all readable and writable at once. Newer Android versions lock this down tightly through scoped storage, which is exactly why older mobile launchers forced people to install separate file explorer apps just to drop a shader pack into the right place.
Zalith Launcher removes that entire problem by handling file access internally. Every folder Minecraft needs lives inside a manager built into the app itself, so you never have to grant a third-party app storage permissions or worry about Android quietly blocking a folder from being read. It also means your files stay organized the way Minecraft actually expects them, rather than scattered wherever a random file app decided to place them.
No Root Required
Every folder Minecraft needs is reachable straight from inside Zalith Launcher, so there is no need to root your device or install a separate explorer app.
Custom Folder Locations
Choose exactly where your game data lives, including internal storage or an SD card, instead of being locked to one default location.
Version Isolation
Each Minecraft version can keep its own separate saves, mods, and resource packs so nothing from one setup interferes with another.
What The File Manager Actually Lets You Do (Zalith Launcher)
The file manager isn’t a single button, it’s a full set of tools spread across different folders inside the app. Here’s what each one is actually for before you start moving anything around.
Import and Organize Mods
Drop Forge, Fabric, or NeoForge mod files directly into the correct version folder without touching Android’s system file picker every single time.
Backup and Restore Saves
Copy an entire world folder out to a safe location before a risky update or a big mod change, then restore it in seconds if anything goes wrong.
Manage Texture and Resource Packs
Move resource packs straight into the resourcepacks folder for any version, then enable or disable them from inside Minecraft without leaving the launcher.
Handle Shader Pack Files
Place shader pack zips exactly where the shader mod expects them, avoiding the broken lighting that comes from a misplaced file.
Read More: Zalith Launcher Zink Renderer / What It Is and How to Enable It
Zalith Launcher Quick Reference Table
A fast lookup for exactly where each type of file belongs before you open the file manager.
| File Type | Correct Folder | Access Point |
|---|---|---|
| Mods (.jar files) | mods folder inside the version directory | File Manager > Versions > mods |
| Resource packs (.zip files) | resourcepacks folder | File Manager > resourcepacks |
| Shader packs (.zip files) | shaderpacks folder | File Manager > shaderpacks |
| Saved worlds | saves folder inside the version directory | File Manager > Versions > saves |
| Skins and player models | assets or custom skins folder | File Manager > Skins |
| Config files for mods | config folder | File Manager > Versions > config |
| Backups you create manually | any folder outside .minecraft, ideally external storage | File Manager > Copy To |
How To Use The File Manager Of Zalith Launcher
Zalith launcher Follow these in order the first time you use it. Once you understand the folder layout, most of these steps take a few seconds each.
Open the File Manager From the Main Menu
Launch Zalith Launcher and look for the File Manager option in the side menu or settings panel. This opens the full folder tree the app uses internally, starting at the root game directory.
Set Your Preferred Game Directory
Before importing anything, confirm whether your game folder is set to internal storage or an SD card. Everything you add afterward will follow whichever location you choose here.
Navigate Into the Correct Version Folder
Each installed Minecraft version has its own folder if version isolation is turned on. Open the matching version before placing any mod, save, or config file.
Import Files Using the Add Button
Tap the import or add option inside the file manager and select the file from your device’s downloads. Zalith Launcher places it directly into the folder you currently have open.
Rename or Move Files as Needed
Long press any file inside the manager to bring up rename, move, and delete options. This is the fastest way to clean up duplicate mods or misplaced resource packs.
Back Up Your Worlds Folder Regularly
Copy the entire saves folder to a separate backup location every so often, especially before installing a new mod or updating the launcher itself.
Check Config Files if Something Looks Off
Some mods store their settings in a config folder. If a mod behaves oddly after an update, the config file itself may still reference old settings and can be reset here.
Clean Out Unused Files Periodically
Delete old mod versions, duplicate resource packs, and leftover backups every few weeks. A cluttered folder structure slows down load times more than most people expect.
Understanding the Folder Structure Zalith Launcher
Zalith Launcher follows the same folder logic as desktop Minecraft, just wrapped inside its own file manager so Android permissions never get in the way. Turning on version isolation changes this slightly, since every version then gets its own complete copy of the folders below instead of sharing one shared set.
| Folder | Purpose | Common Mistake |
|---|---|---|
| .minecraft (root) | Main directory holding every version, asset, and shared file | Deleting it entirely instead of a single version subfolder |
| versions | Stores each installed Minecraft version separately | Placing a mod here instead of inside the version’s own mods folder |
| saves | Holds every world you’ve created or imported | Forgetting to back this up before a mod change |
| resourcepacks | Stores texture and resource packs available in game | Leaving old packs here that conflict with newer ones |
| shaderpacks | Stores shader packs used by shader mods | Placing a shader zip in resourcepacks by mistake |
Always copy a folder out to a backup location before deleting it inside the file manager. There’s no built-in undo, so a mistaken delete on the saves folder means that world is gone for good.
If you plan to run more than one modded setup, enable version isolation before importing mods. Turning it on later means manually sorting files that are already mixed together.
Good Habits That Keep Your Files From Piling Up Zalith Launcher
Most file management problems in Zalith Launcher come from skipping small habits early on rather than anything the app does wrong. Name your backup folders with the date you made them so you always know which one is newest. Keep a separate folder per modpack instead of mixing multiple mod sets inside one version, since a single shared mods folder is the fastest way to end up with conflicting files you can’t identify later.
Check your available storage every so often too. Shader compilation and resource pack loading both need free space to work with, and a nearly full device causes file operations to silently fail without any warning inside the file manager itself.
FAQs
Quick answers about managing game files inside Zalith Launcher.
Conclusion
Zalith Launcher’s built-in file manager replaces a whole stack of third-party apps and permission headaches with one clean interface that already understands exactly how Minecraft’s folders are supposed to work. Once you know where mods, saves, resource packs, and shaders each belong, importing or backing up anything takes seconds instead of minutes.
The habits that keep this running smoothly are simple: back up your saves folder before trying anything new, turn on version isolation early if you’re running multiple setups, and clear out old files every few weeks instead of letting them pile up. Get those three right and file management stops being a chore and turns into something you barely think about.
How Much Storage To Keep Free For Game Files
File imports, backups, and shader compilation all need breathing room to complete properly. Use this as a rough guide based on how heavily you mod your game.
| Play Style | Recommended Free Space | Notes |
|---|---|---|
| Vanilla, no mods | 2GB to 3GB | Mostly covers asset downloads and world saves |
| Light modding, few resource packs | 3GB to 5GB | Leaves room for a couple of backup copies of your worlds |
| Heavy modpacks with shaders | 6GB to 8GB | Shader compilation and large texture packs need extra headroom |
| Multiple isolated versions | 8GB or more | Each version keeps its own full set of saves, mods, and packs |