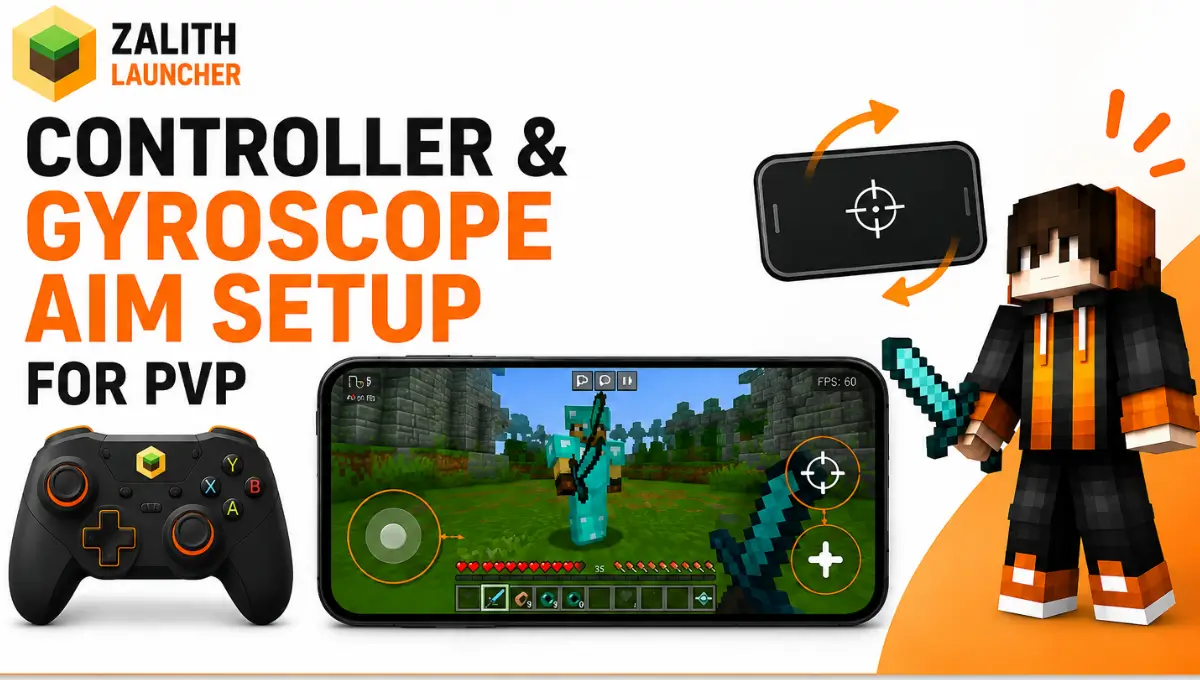
Zalith Launcher Controller & Gyroscope Aim Setup for PvP (2026)
Touchscreen aiming is the single biggest disadvantage mobile players carry into Minecraft PvP, and no amount of practice fully closes the gap against someone playing on a mouse. Zalith Launcher narrows that gap two ways, full Bluetooth controller support and a built-in gyroscope aiming mode that turns small phone tilts into precise crosshair movement. In this guide we’ll set up both systems from scratch, tune the sensitivity values that actually matter in combat, and walk through the exact control layout competitive mobile players rely on, from A to Z.
Zalith Launcher PvP Needs a Better Input Method Than Touch
Minecraft Java Edition was built around a mouse that translates tiny wrist movements into fast, precise camera turns, something a flat piece of glass simply cannot replicate. Touch controls force your thumb to do two jobs at once, hold a virtual joystick for movement and drag a separate area of screen for aim, and that split attention costs reaction time in every fight. Zalith Launcher solves this by mapping real hardware and phone sensors directly onto Minecraft’s input system.
A Bluetooth controller gives you two analog sticks and physical trigger buttons, closer to console aiming than touch will ever get. Gyroscope aiming goes a step further and lets you turn the camera by physically tilting the phone, the same technique competitive mobile shooter players have used for years. Neither replaces good positioning and timing, but both remove the biggest mechanical disadvantage mobile PvP players face.
Input Methods Zalith Launcher Supports
Zalith Launcher recognizes several ways to control aim and movement, and each one fits a different play style. Touch controls remain the default for anyone without extra hardware, using an on-screen joystick paired with a swipe area for the camera. Bluetooth controllers connect through Android’s native pairing and map directly to Minecraft’s keyboard and mouse bindings, giving you real analog aim. Gyroscope mode reads your phone’s motion sensor and blends it with touch, so small tilts fine-tune your aim while your thumb still handles movement. A virtual mouse mode is also available for menu navigation and building, though it is rarely used during actual combat. Picking the right combination below saves a lot of trial and error.
| Input Method | Aim Precision | Learning Curve | Best For |
|---|---|---|---|
| Touch Only | Low | None | Casual survival, building |
| Gyroscope + Touch | High | Moderate | Solo PvP, no extra hardware needed |
| Bluetooth Controller | High | Low | Console-style players, long sessions |
| Controller + Gyroscope | Very High | Moderate | Competitive PvP, small flick corrections |
Also Read: Apply Custom Skins in Zalith Launcher Without Microsoft Login
PvP Settings That Actually Matter in Zalith Launcher (Category)
Four settings decide how your combat feels more than anything else in the menu. Gyroscope sensitivity controls how far the camera turns per degree of tilt. Touch sensitivity does the same job for swipe-based aiming. Attack bar behavior determines whether you swing at full strength or get punished by Minecraft’s cooldown system. Joystick placement affects how fast you can strafe around an opponent mid-fight. Get these four right and the rest of your control layout becomes a matter of personal comfort rather than performance.
Gyroscope Sensitivity
Controls fine camera correction from tilting the phone. Too high causes overshoot on flicks, too low feels sluggish when tracking a strafing opponent.
Controller Deadzone
Sets how far you push an analog stick before it registers movement. A tight deadzone stops stick drift from causing accidental camera turns.
Attack Bar Control
Manages hit cooldown timing on 1.9-plus servers. Getting this wrong means every other hit lands as a weak, low-damage tap instead of a full swing.
Joystick Placement
Positioning the movement stick correctly keeps your thumb ready to strafe the instant a fight starts, without stretching across the screen.
Connecting a Bluetooth Controller (Category)
Zalith Launcher recognizes most standard Bluetooth and USB-OTG controllers, including Xbox, PlayStation and generic gamepads, and maps them to Minecraft’s normal keyboard and mouse bindings automatically. Once paired at the Android system level, the launcher’s control editor lets you fine-tune every stick, trigger and button to match your preferred layout.
Xbox-Style Controllers
The most consistently detected layout, right stick maps to camera by default and both triggers register as analog inputs for smoother sprinting.
PlayStation-Style Controllers
Detected as a standard HID gamepad, works well once you manually rebind face buttons since default mapping sometimes swaps jump and sneak.
Generic USB-OTG Gamepads
Cheapest and most reliable option for older phones without Bluetooth 5, connects through a USB-OTG adapter with almost no input lag.
Gyroscope-Only Setup
No hardware required at all, uses your phone’s built-in motion sensor alongside the touch joystick for surprisingly precise aim correction.
Gyroscope Aiming Explained with Zalith Launcher
Gyroscope aiming reads the same motion sensor your phone uses for auto-rotate and feeds it directly into Minecraft’s camera control. Instead of dragging your thumb across the screen to turn, you tilt the entire device left, right, up or down, and the crosshair follows that tilt in real time. Zalith Launcher lets you run gyroscope aim on top of your normal touch joystick, so movement still comes from your thumb while fine aim correction comes from your wrist. Most players use gyroscope for small tracking adjustments during a fight, and touch swipes for the larger, faster turns needed to face a completely different direction.
Note: Do not run gyroscope sensitivity above roughly 60 percent alongside a controller, the two inputs stack and cause your camera to overcorrect on every stick movement. Start low with any new setting and raise it gradually rather than jumping straight to maximum sensitivity.
How to Set Up Controller and Gyroscope Aim (Zalith Launcher )
Setting up combat-ready controls in Zalith Launcher takes just a few minutes once you know where each option lives. Pair your hardware first if you’re using one, then layer gyroscope on top, and finish by tuning the sensitivity values that decide how the whole setup actually feels in a real fight. Follow the steps below in order.
Pair Your Controller (Optional)
Turn on Bluetooth pairing mode on your controller, connect it through Android’s Bluetooth settings, then open Zalith Launcher, it should be detected automatically.
Open the Control Settings Menu
From the launcher’s main menu, open Settings, then Controls, this is where every input method, touch, gyroscope, and controller, gets configured.
Enable Gyroscope Aim
Toggle Gyroscope Control on, then set the sensitivity slider to a low starting value, around 25 to 30 percent, before your first test fight.
Rebind Controller Buttons
If using a gamepad, open the button mapping screen and confirm attack, sprint, and inventory keys match your muscle memory before you commit to a layout.
Adjust Attack Bar Sensitivity
Open Combat settings and set the attack bar to match the server’s combat version, this decides whether your hits land at full damage.
Test in a Practice World
Load a singleplayer world or a practice server, spawn a target, and adjust sensitivity in small steps until tracking feels natural rather than jumpy.
Recommended Sensitivity Values by Playstyle Zalith Launcher
The right sensitivity depends on your input method and how you personally fight. Use the table below as a starting point rather than a fixed rule, then adjust in small increments from there.
| Playstyle | Recommended Setup |
|---|---|
| Defensive, W-tap focused | Touch + Gyroscope at 30 to 40 percent |
| Aggressive combo PvP | Controller with tight deadzone, gyroscope disabled |
| Long-range crystal or bow PvP | Controller + Gyroscope at 50 to 60 percent for fine tracking |
| New to non-touch controls | Gyroscope only, start at 20 percent, raise slowly |
| Building and survival, no PvP | Touch only, gyroscope off |
Joystick and Button Layout Tips for Combat
Zalith Launcher Layout matters just as much as sensitivity once you’re actually swinging a weapon. Keep the movement joystick in the lower-left corner with a medium-large size, that spot keeps strafing available without stretching your thumb across the screen. Place the attack button close enough to the joystick that you can hit both without lifting your thumb between hits, and keep the jump and sneak buttons grouped together on the right side near your gyroscope tilt zone. Avoid placing frequently used buttons directly under where your controller hand naturally rests if you’re using both inputs together, overlapping zones cause accidental taps during fast combat exchanges.
Common Controller and Gyroscope Problems
Most aiming problems come down to one of a handful of causes. Work through the list below before assuming your hardware is broken.
Pros and Cons of Zalith Launcher
Adding a controller or gyroscope aim to Zalith Launcher closes most of the gap against mouse-based PvP players, but the setup still comes with real tradeoffs worth knowing before you commit to one input method over another.
Pros
Cons
FAQs
Quick answers about controller and gyroscope setup on Zalith Launcher.
Conclusion
Closing the gap against mouse-based PvP players on mobile comes down to picking the right input method and taking the time to tune it properly, a controller for raw precision, gyroscope for fine correction with no extra hardware, or both stacked together for competitive combat. Start with the sensitivity values in the table above, test everything in a practice world before jumping into a real fight, and adjust your joystick and button placement until nothing feels like a stretch mid-combo. Once your setup feels natural, the mechanical disadvantage that usually holds mobile players back in PvP stops being a factor, and every fight comes down to positioning, timing, and game sense instead.