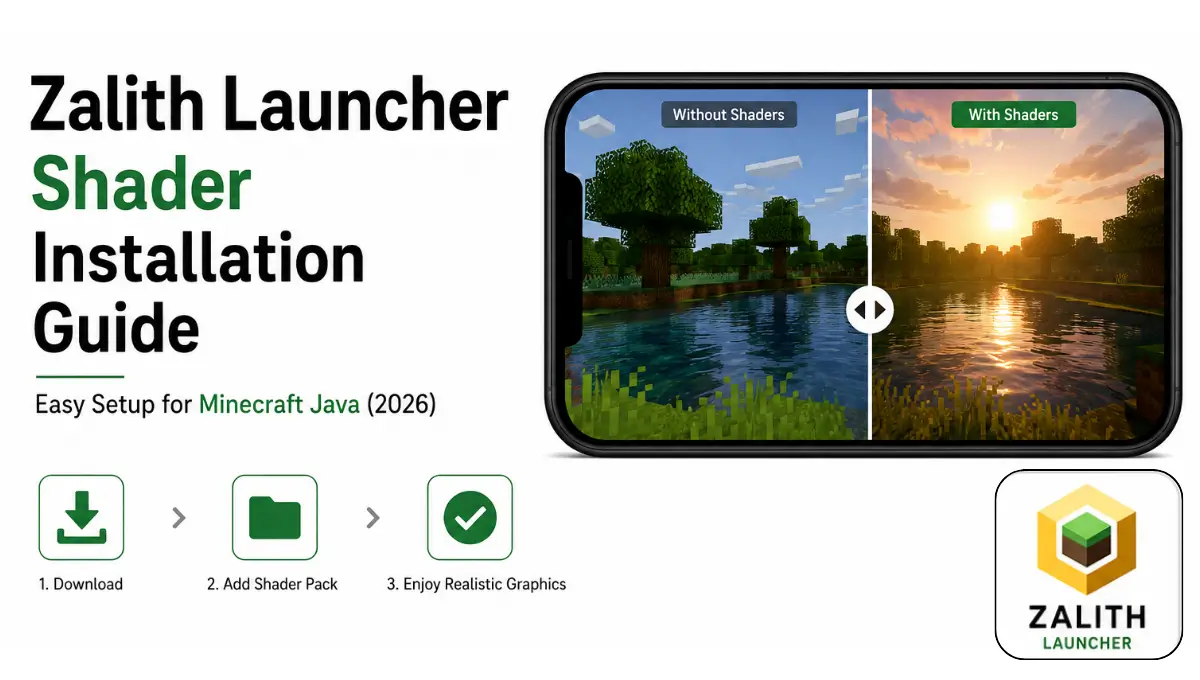
Zalith Launcher Shader Installation Guide – Easy Setup for Minecraft Java (2026)
Default Minecraft graphics on Android look fine, but let’s be honest, they get boring fast. Flat lighting, no shadows, water that doesn’t reflect the sky, it’s playable but it’s not pretty. Shaders fix all of that, and thanks to Zalith Launcher, you no longer need a gaming PC to enjoy ray-traced water, dynamic shadows, and warm sunset lighting inside Minecraft: Java Edition.
The catch is that shader setup on Android isn’t quite as simple as tapping “download.” You need the right mod loader, the right renderer, and a shader pack that actually matches your device’s power. Get any one of those wrong and you’ll either see a black screen or your phone will turn into a space heater. This guide walks through the entire process, Iris + Sodium, OptiFine, picking the right shader pack for your hardware, and fixing the errors people hit most often, so you can get it right on the first try.
What Shaders Actually Do (And Why They’re Heavier Than a Resource Pack)
A resource pack only changes textures, the flat images wrapped around blocks. Shaders go much deeper: they replace the actual rendering pipeline that decides how light behaves in the world. That’s why shaders can add real-time shadows that move with the sun, water that reflects clouds, god rays through tree leaves, and warm ambient lighting near torches and lava. It’s also why shaders cost so much more in raw performance, your phone’s GPU is now calculating lighting for every block face in your render distance, every single frame.
Zalith Launcher On Android, Minecraft: Java Edition doesn’t support shaders out of the box the way the PC version does. Zalith Launcher runs Java Edition through a translation layer, so shaders need a compatible renderer sitting underneath them. That’s where Iris Shaders or OptiFine come in, both are mod loaders that add shader support back into the game, and both work inside Zalith Launcher once installed correctly. Pick the wrong one for your Minecraft version, or skip a dependency, and the shader option in Video Settings simply won’t appear, or the game will crash the moment you enable one.
Iris + Sodium vs OptiFine: Which One Do You Actually Need?
This is the one decision that determines whether the rest of your setup goes smoothly. Both loaders enable shaders, but they target different Minecraft versions and behave very differently on mobile hardware.
| Loader | Best Minecraft Version | Performance | Mod Loader Needed |
|---|---|---|---|
| Iris Shaders + Sodium | 1.17 and newer | Much better FPS, built for modern hardware | Fabric |
| OptiFine | 1.8.9 – 1.16.5 (older versions) | Heavier on the GPU, but only real option pre-1.17 | Forge or standalone |
Iris + Sodium — Recommended
The go-to choice for 1.17 and above. Sodium rewrites the rendering engine for speed, Iris plugs shader support back on top of it, together they give the best FPS-to-visuals ratio on Android.
OptiFine — Older Versions
Needed for 1.16.5 and below, where Iris isn’t available yet. Heavier on your GPU, but still the only reliable way to run shaders on legacy Minecraft versions.
Not Sure Which Version You’re On?
Open Zalith Launcher, tap your selected profile, the version number sits right under the profile name. That single number decides your whole shader path.
Before you start: Shaders only work with the Fabric or Forge version of your Minecraft profile, not the plain Vanilla one. Create a Fabric (or Forge, for OptiFine) profile in Zalith Launcher first if you haven’t already. Also check your phone’s RAM, shaders genuinely need at least 4GB total, 6GB or more is where things start looking smooth rather than slideshow-like. And a quick heads-up before you go hunting for files: only download shader packs and .jar mod files from official sources like Modrinth or CurseForge, random file-sharing links are a common way malware ends up disguised as a shader pack.
How to Install Iris + Sodium Shaders (Zalith Launcher)
This is the recommended path for anyone on Minecraft 1.17 or newer. Iris and Sodium are added as regular Fabric mods, then the shader pack itself is dropped in through the in-game menu. Follow the steps below in order and don’t skip the Sodium download, Iris won’t run without it.
Create a Fabric Profile
In Zalith Launcher, tap Version Management, then New Install, choose your Minecraft version and select Fabric as the loader. Save and let it finish downloading.
Download Sodium and Iris
Open Modrinth or CurseForge in your browser, search for Sodium, download the .jar matching your Minecraft version, then repeat the same search for Iris.
Add Both Mods in the Launcher
Open your Fabric profile in Zalith Launcher, go to the Mods tab, tap Add Mod, and import both the Sodium and Iris .jar files from your storage.
Download a Shader Pack
Grab a shader pack built for Iris, such as Complementary or BSL, from Modrinth. Keep the file as a .zip, don’t extract it.
Drop It Into the Shaderpacks Folder
Launch Minecraft once through the Fabric profile so the shaderpacks folder gets created, then use the launcher’s file manager to move your .zip into it.
Enable It From Video Settings
In-game, open Options, then Video Settings, tap Shader Packs, and select the one you just added. Give it a few seconds to compile shaders on first load.
Read More: Is Zalith Launcher Safe to Use? A Complete Security Review
How to Install Shaders with OptiFine (Older Versions)
If your world is still running on 1.16.5, 1.12.2, or older, Iris won’t help you, that mod only supports 1.17 and up. OptiFine is your shader path here instead. The process is a little different: instead of adding OptiFine as a regular mod, Zalith Launcher installs it as its own version profile.
| Step | Action |
|---|---|
| 1 | Download the OptiFine installer .jar matching your exact Minecraft version from the official OptiFine site |
| 2 | Open Zalith Launcher, go to Version Management, and tap Install OptiFine |
| 3 | Select the downloaded .jar file when prompted, the launcher builds a new OptiFine profile automatically |
| 4 | Select that new OptiFine profile from your version list before launching |
| 5 | In-game, go to Options, Video Settings, Shaders, then Shaderpacks Folder to drop in your .zip shader file |
One thing worth knowing before you commit to this route: OptiFine shader support is noticeably heavier on the GPU than Iris, since it wasn’t built with Android hardware in mind. If a shader pack runs fine on a friend’s Iris setup but chugs badly through OptiFine on the same phone, that’s expected, it’s not something you’re doing wrong. Stick to lighter shader packs if you’re on OptiFine and want to keep frame rates playable.
Common Shader Errors and Quick Fixes
Shader problems on Zalith Launcher almost always trace back to a mismatched version, a missing dependency, or a device that’s simply being asked to do too much. Here’s what to check first for the errors people run into most.
| Problem | Likely Cause | Fix |
|---|---|---|
| Shader Packs option is missing | Iris or OptiFine isn’t actually loaded | Confirm you launched the Fabric/OptiFine profile, not Vanilla |
| Game crashes on shader load | Sodium wasn’t installed alongside Iris | Add the matching Sodium .jar for your Minecraft version |
| Black or purple screen in-game | Shader pack built for a newer/older Iris version | Download a shader build that matches your Minecraft version exactly |
| Severe FPS drop or freezing | Shader pack too heavy for your GPU | Switch to a lightweight pack, lower render distance |
| Shader pack won’t appear in the list | File placed in the wrong folder, or still zipped incorrectly | Confirm it’s a valid .zip sitting directly in the shaderpacks folder |
| Overheating after a few minutes | Thermal throttling from sustained GPU load | Lower shader quality, take short breaks between sessions |
Downloading Shaders Safely
Because shader packs and mods are just files you sideload onto your device, it’s worth being a little careful about where they come from. A “cracked” or “premium unlocked” shader pack that promises features other packs charge for is a common way people end up with malware disguised as a .zip file:
Switching or Removing Shader Packs Later
Once Iris or OptiFine is installed, trying new shader packs is quick, you don’t need to reinstall anything. Just drop another .zip into the same shaderpacks folder, open Video Settings in-game, and select it from the list. Minecraft keeps every pack you’ve added, so you can flip between a lightweight pack for busy survival sessions and a heavier cinematic one for screenshots, without redoing the setup each time.
To remove a shader pack entirely, open the shaderpacks folder through Zalith Launcher’s file manager and delete the .zip directly. This has zero effect on Iris, Sodium, or your Fabric profile, those stay installed until you remove the mods themselves. If you ever want to go back to vanilla rendering without uninstalling anything, just set Shader Packs to “Off” inside Video Settings, everything else stays exactly as it was for next time.
Choosing a Shader Pack That Matches Your Device
Not every shader pack is built the same, and this is where most people end up disappointed, they download the most cinematic-looking pack from a YouTube thumbnail and it drops their phone to 8 FPS. Shader packs generally fall into three weight classes based on how much lighting math they run per frame. Match the pack to your device, not to what looked best in a trailer.
| Shader Weight | Examples | Good For |
|---|---|---|
| Lightweight | Lithos, Rethinking Voxels (low preset) | Mid-range phones, 4–6GB RAM |
| Medium | Complementary Reimagined, BSL | Newer phones, 6–8GB RAM, Snapdragon 7-series and up |
| Heavy / Cinematic | Complementary Unbound, SEUS PTGI | Flagship devices only, 8GB+ RAM with a strong GPU |
Getting Better FPS With Shaders Enabled
Shaders will always cost more performance than vanilla rendering, that’s simply the trade-off, but a handful of settings changes make a real difference on Android without gutting the visuals entirely.
FAQs
Quick answers about running shaders on Zalith Launcher.
Conclusion
Getting shaders running on Zalith Launcher isn’t complicated once you know which loader matches your Minecraft version, Iris and Sodium for 1.17 and up, OptiFine for anything older. The part that actually matters most is picking a shader pack that respects what your phone can handle, a lightweight pack running at a steady 30+ FPS will always feel better to play than a cinematic one that stutters every few seconds.
Set up your Fabric or OptiFine profile carefully, download files only from trusted sources, and work your way up through shader weight classes instead of jumping straight to the heaviest option you found online. Once it’s dialed in, switching between shader packs takes seconds, and your same-old Minecraft world suddenly looks like a completely different game.