How to Fix Lag and Boost FPS in Zalith Launcher
There’s a specific kind of frustration that comes with lag in Minecraft, you turn to place a block and the game is still catching up from three seconds ago. On a PC you’d just lower a setting and move on, but on Android, running Minecraft: Java Edition through Zalith Launcher, the reasons behind that stutter are a little more layered. Your phone isn’t just running the game, it’s running a full Java runtime and translating rendering calls into something your GPU understands, and all of that adds overhead before a single frame even hits the screen.
The part that usually gets missed is that most lag isn’t actually about your phone being “too weak.” It’s about a handful of settings, renderer choice, render distance, RAM allocation, quietly working against each other. Fix those, in the right order and the same device that was struggling to hold 20 FPS can often sit comfortably above 60. This guide walks through exactly which settings matter, why they matter and the order to tackle them in so you’re not randomly toggling things and hoping for the best.
Why Minecraft Lags on Android Through Zalith Launcher
Minecraft: Java Edition was never built with phones in mind. It expects a desktop GPU and a rendering pipeline called OpenGL, which most Android chipsets don’t speak natively. Zalith Launcher solves this by running a full Java Virtual Machine on your device and translating OpenGL instructions into something your phone’s GPU can actually process, usually through Vulkan or a compatibility layer like GL4ES or Zink. That translation step costs performance before the game world has even loaded a single chunk.
Minecraft performance on Zalith Launcher depends on more than just RAM. Every rendered chunk particle mob and block entity increases the workload on your CPU and GPU. Devices with mid range hardware have fewer resources than gaming PCs so settings like render distance particles and entity shadows have a much bigger impact on FPS. The advantage is that even small adjustments can produce noticeable performance improvements. Lowering unnecessary graphics settings choosing the right renderer and reducing visual effects help Zalith Launcher run more smoothly. These simple changes allow Zalith Launcher users to enjoy stable gameplay with higher FPS and fewer performance issues.
Quick Wins: Settings Worth Changing First
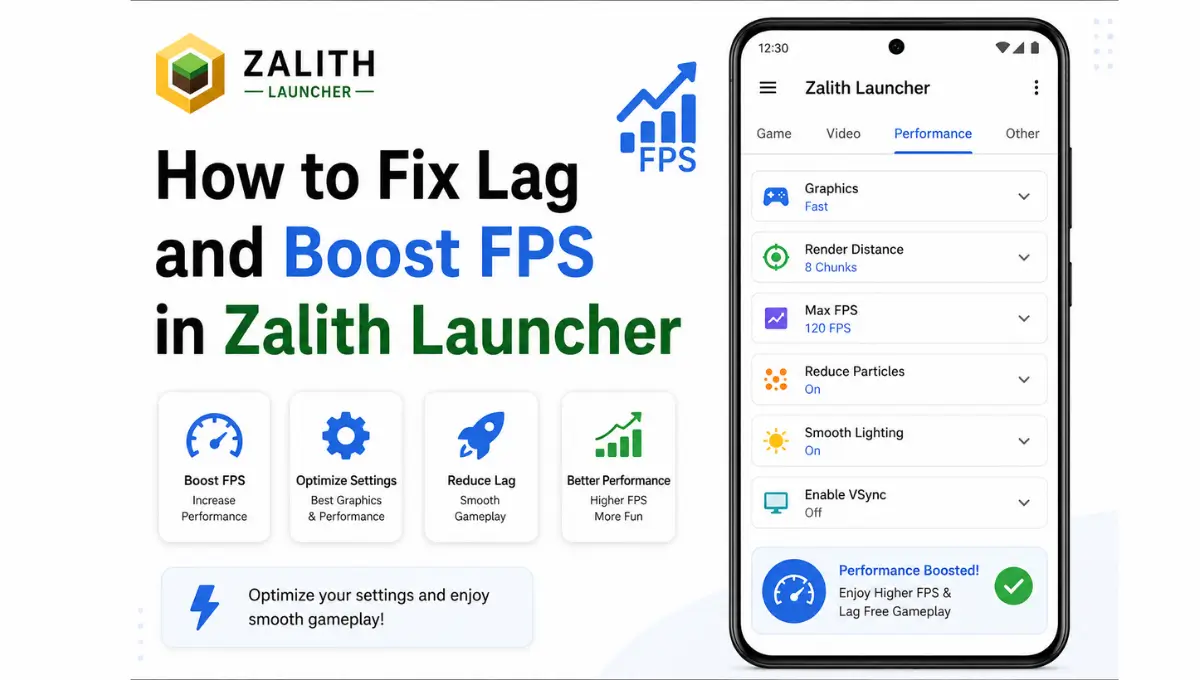
Before diving into renderers or RAM in Zalith Launcher there are a handful of in game settings that take seconds to change and typically account for the biggest visible jump in FPS. Work through this table before trying anything more advanced because most Zalith Launcher users never need to go beyond these simple performance tweaks.
| Setting | Change To | Why It Helps |
|---|---|---|
| Graphics | Fast | Removes transparent water/leaves calculations that cost the most per frame |
| Render Distance | 6-8 chunks | Fewer chunks loaded means far less for the GPU to draw every frame |
| Smooth Lighting | Off or Minimum | Ambient occlusion lighting is one of the heavier vanilla effects |
| Particles | Minimal | Explosions, potions, and rain particles quietly spike frame time |
| Max Framerate | Unlimited (or 60 if battery matters) | An artificial FPS cap can make the game feel laggier than it is |
| V-Sync | Off | V-Sync adds input delay and caps FPS to your screen’s refresh rate |
Choosing the Right Renderer: OpenGL vs Vulkan/Zink vs GL4ES
One of the biggest performance improvements in Zalith Launcher comes from choosing the right render backend. Many users never change this setting even though it can significantly increase FPS and improve game stability. Zalith Launcher supports different rendering options and the best choice depends on your device chipset and GPU rather than a single universal setting. A renderer that performs well on one phone may not deliver the same results on another. Testing each option helps you find the best balance between speed and compatibility. With the correct renderer Zalith Launcher delivers smoother gameplay and Zalith Launcher performs at its full potential.
If you’re not sure which one to pick, the honest answer is to test all three. Switch the renderer in Zalith Launcher’s settings, launch the same world, and watch the FPS counter for a minute or two of normal movement. Whichever holds the highest, steadiest number on your specific device is the right one, benchmarks from other phones are only a starting point, not a guarantee.
Also More: How to Fix Zalith Launcher Crashing or Not Opening (2026 Guide)
Getting RAM Allocation Right
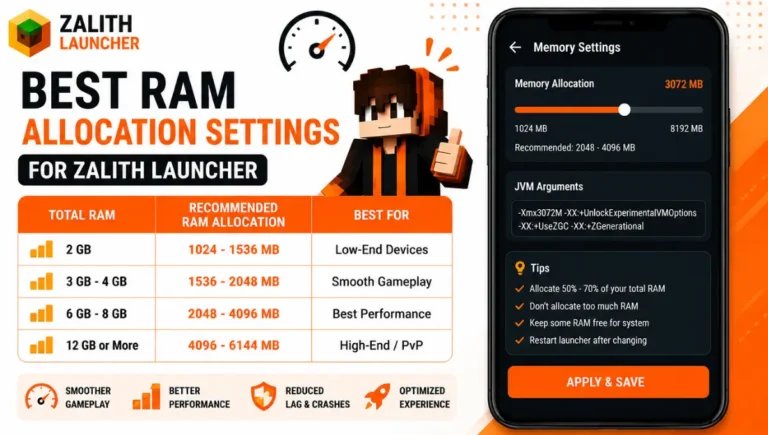
It’s tempting to think more RAM always means better performance, but on Android that logic backfires quickly. Allocate too much and you starve Android’s own background processes, which causes stutter that looks like a Minecraft problem but isn’t. Allocate too little and the game itself starts struggling to keep chunks and entities in memory, which shows up as sudden freezes rather than a steady low framerate. The goal is a number that gives Minecraft room to breathe without crowding out the rest of your system.
| Total Device RAM | Recommended Allocation | Good For |
|---|---|---|
| 4GB | 1.5-2GB | Vanilla survival, low render distance |
| 6GB | 2.5-3.5GB | Vanilla worlds with a few lightweight mods |
| 8GB | 3.5-4.5GB | Fabric mods, medium shader packs |
| 12GB+ | 5-6GB | Heavier modpacks or cinematic shader packs |
These numbers are starting points, not hard rules. If you notice stuttering that clears up after closing background apps, that’s a sign your allocation is already close to the ceiling your device can support, and the fix is closing apps rather than raising the slider further.
Step-by-Step: A Full Lag Fix Walkthrough
Follow this step by step guide to fix lag in Zalith Launcher without missing any important settings. Start by lowering the render distance reducing graphics quality and closing background apps. Next choose the best renderer for your device update your graphics drivers if available and enable performance focused settings. Zalith Launcher also performs better when you use compatible optimization mods like Sodium or Embeddium. After each change test your FPS before moving to the next step. This method helps Zalith Launcher users identify the real cause of lag and ensures Zalith Launcher delivers smoother and more stable Minecraft gameplay.
Close everything running in the background
Swipe away every app you’re not using before launching Minecraft. Background apps quietly hold onto RAM and CPU cycles the game could otherwise use.
Apply the quick-win settings first
Set Graphics to Fast, render distance to 6-8 chunks, and particles to Minimal. This alone resolves the majority of lag complaints.
Test each renderer option
Switch between OpenGL, Vulkan/Zink, and GL4ES in Zalith Launcher’s settings, testing FPS in the same world for a minute or two on each.
Set RAM allocation based on your total device memory
Use the table above as a starting point, then nudge it up or down slightly based on how the game actually behaves during play.
Add performance mods if you’re comfortable with Fabric
Sodium and Lithium are built specifically to optimize rendering and game logic without changing how Minecraft looks or plays.
Clear cache and restart if performance still feels off
A buildup of shader and chunk cache data can quietly slow things down over weeks of play. Clearing it gives the launcher a clean slate.
Mods and Shaders: Getting Extra Performance, Not Just Extra Looks
It’s easy to think of mods only as a way to add features or improve visuals, but a specific category of Fabric mods exists purely to make Minecraft run faster without changing anything about how it looks or plays. These are worth installing before you even consider a shader pack, since they lower the baseline cost of everything else you add on top.
If you’re also running a shader pack, remember that shaders and performance mods aren’t working against each other, Sodium and Iris in particular are designed to run together. Just don’t expect a heavyweight cinematic shader pack to run smoothly no matter how many performance mods you stack underneath it, some visual settings simply cost more than a mid-range phone can spare, and that’s a hardware ceiling, not a setting you missed.
Mistakes That Actually Make Lag Worse
A few habits show up again and again in performance complaints, and fixing them is often quicker than any setting change above. Maxing out RAM allocation “just to be safe” is the most common one, followed closely by running a heavy shader pack and a demanding modpack at the same time and being surprised when FPS collapses. Playing with the phone plugged in and charging can also trigger thermal throttling faster than playing unplugged, since the extra heat from charging stacks on top of gameplay heat. None of these are dramatic mistakes, they’re just easy to overlook when you’re focused on the in-game settings menu.
FAQs
Quick answers about fixing lag and boosting FPS in Zalith Launcher.
Conclusion
Lag on Zalith Launcher almost never comes down to one broken thing, it’s usually a stack of small inefficiencies, a heavier-than-needed graphics setting, a renderer that doesn’t suit your chipset, RAM allocated a little too aggressively, all adding up quietly. Working through them in order, quick-win settings, renderer testing, RAM tuning, performance mods, clears out that stack layer by layer instead of guessing at a single fix and hoping it’s the right one.
Once it’s dialed in, the difference is hard to overstate, the same world that stuttered at 18 FPS can genuinely hold a steady 60 or more, and it stays that way as long as you don’t stack a heavyweight shader pack on top and expect the same numbers. Test what your specific device can handle, build up gradually from there, and you’ll spend a lot more time playing and a lot less time watching a frame counter.